This guide is designed to help you configure Single Sign-On (SSO) for Re-Leased using Azure Active Directory (AD). Single Sign-On is an authentication process that allows users to log in to multiple applications with one set of credentials. This secure and convenient feature simplifies the sign-in process for your team. We will go step-by-step through the setup process.
Add Re-Leased to Azure Active Directory
- Log in to the Microsoft Azure Portal and navigate to Azure Active Directory > Enterprise Applications blade.
- Click on New Application, then select Create your own application.
- Choose Integrate any other application you don’t find in the gallery (Non-gallery), name the application Re-Leased, and click Create.
- Select the Single sign-on blade and choose the SAML option.
Basic SAML Configuration
- Click Edit under step 1 (Basic SAML Configuration).
- Using the information provided by the Manage Single Sign On page in Re-Leased's settings, input the following:
-
- Re-Leased Audience URI (Service Provider Entity ID) into Azure Identifier (Entity ID) field.
- Re-Leased ACS URL into Azure Reply URL (Assertion Consumer Service URL) field.
- Re-Leased Sign-on URL into the Azure Sign on URL (Optional) field.
3. Leave any other fields empty, click Save, and then close the configuration blade.
SAML Certificates
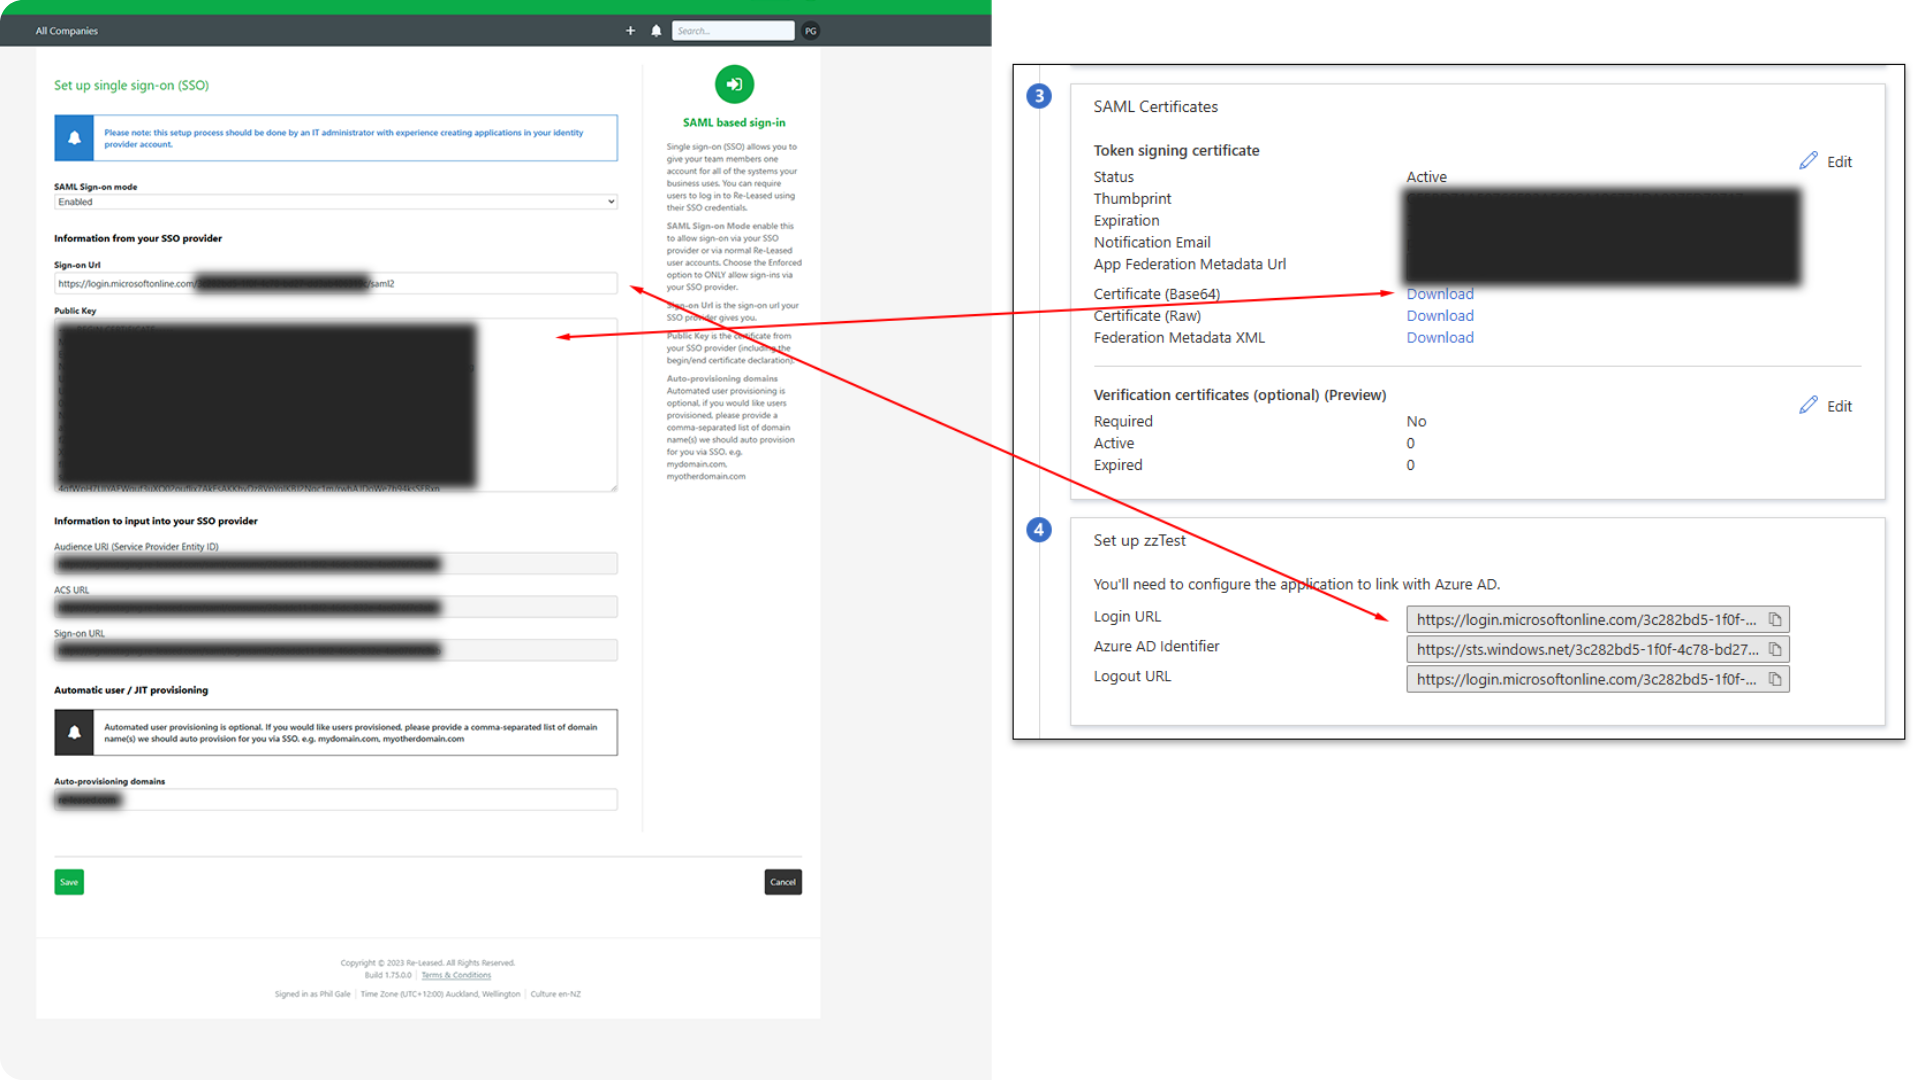
- Scroll to Step 3 (SAML Certificates) and Download the Certificate (Base 64), saving the .cer file.
- Open the .cer file with a text editor like Notepad and copy its entire contents.
- Paste this into the Re-Leased Public Key field, including the "BEGIN/END CERTIFICATE" text.

Finalizing Setup
- Under Step 4 (Set up Re-Leased), copy the Azure AD Login URL.
- Paste this into the Re-Leased Sign-on URL field and save your changes.
With these steps, your SSO configuration for Re-Leased is complete. You may now assign users or groups within Azure AD to this enterprise application to enable SSO.